Braze Kit "Tips and Tricks"
Hi! Thank you for the purchase of your Braze kit! I wanted to take the time to write out these basic functions for you to enjoy your new Free Play and High Score Save Kit, LOADED with features for you to enjoy your classic arcade game even more than you already do!
While Braze is not making his kits anymore, Highscoresaves is! Braze retired from the arcade scene a few years ago and we have been making his classic arcade kits and selling them since. We love Scott and all the contributions he's done for the arcade community and we are carrying his kits with the same programming and daughter card design he had since the late 90's.
THIS PAGE IS FOR BRAZE BRANDED KITS.
HighScoreSaves branded kits are HERE
Now, we will get down to the nitty gritty and explain the menu options and whatnots, I do suggest that you watch our YouTube Channel and subscribe, as I try to make a menu run down of each game…

Videoes will also be on the product page under the "video" tab if there is one for your new kit.
Games & Settings -

Asteroids High Score Save Kit -- Extended Scoring
This kit contains special code modifications extending the maximum score from 99,990 to 9,999,990. Original asteroids when it rolled over to zero would reset the difficulty. Around 30,000 and 35,000 points asteroids would become more difficult including no more big saucers. The extended scoring feature of the asteroids kit does not reset the difficulty when it reaches 100,000 and it continues to stay difficult.
Below are some screen shots produced with MAME showing the extended scoring.

Asteroids -- Rev1 vs. Rev2
This kit is based on the Rev2 version of Asteroids. If you have a Rev1 based Asteroids based game, you will need to upgrade the vector rom to Rev2. A Rev2 vector eprom is included with the kit at no extra charge. However it is suggested that you only install the vector eprom if you have a REV1 version. That is, "If it aint broke don't fix it".
There are a couple of easy ways to identify if you have rev1 or rev2, the simplist is to look at the screen during attract mode. The bottom line will show either "ASTEROIDS BY ATARI" (rev1), or "© 1979 ATARI INC" (rev2). Another way is to look at the vector rom chip on the PCB at location N/P3. If the chip is labeled "035127.01", then it is (rev1), if it is labeled "035127.02", then it is (rev2).
Rev1 Asteroids game will display "ASTEROIDS BY ATARI" at the bottom of the screen.

Rev2 Asteroids game will display "© 1979 ATARI INC" at the bottom of the screen.

If you have a Rev1 based Asteroids based game, you will need to upgrade the vector rom to Rev2. It should look like this label -

Asteroids High Score Save Kit -- Erasing High Scores
The procedure used to erase the Asteroids high score table is the same procedure used on the Asteroids deluxe game.
Put the game into selftest mode. Refer to your manual on where to locate the SELFTEST switch. For uprights it is usually inside the coin door.
In selftest mode you should see a display that looks similar to this screen shot below.

While in selftest mode, press and hold (all at once) LEFT, RIGHT, FIRE, and THRUST. For each button pressed in selftest mode you should hear a tone. This is the normal (standard) behavior of Asteroids selftest. Once all 4 buttons have been pressed, you should immediately see a message displayed on the screen with the text "ERASED". This is the indication that the high scores have been cleared. You can now release the buttons and exit selftest.


Asteroids Multigame Kit -- Configuration Settings
The Asteroids Multigame on-screen configuration setup menu allows you to configure your personal game options without crawling into the cabinet to set dip switches and allows separate configuration for all three games. This is also where the high score tables can be erased.
To enter setup mode, place the game in self-test mode. For the upright cabinet, the self-test switch is located inside the cabinet accessible by opening the coin door. For the cocktail cabinet, the self-test switch is located behind the access panel on the left side.
Once in self-test mode, following the on screen instructions, press both start buttons buttons at the same time. The game should now be in configuration setup mode and a top-level menu structure will appear.

Once in the configuration setup mode, use the left and right buttons to move the selector up and down within the menus. The current selected item is indicated by a saucer icon character on the left side of the screen and the current line is also bold (brighter). If the current line is a menu item, pressing the fire button will open (or close) that particular sub-menu.
Within the sub-menu for each fire button press, the current selected field will advance through all of the possible settings for that particular sub item. In this example there are two options for coinage, namely freeplay and 1-coin 1-play.
To save the settings and return to main menu, scroll down to the bottom item SAVE SETTINGS and press the fire button. At this point the current active settings will be saved and the game will return to the main menu. It is at this point that high scores are erased if you selected that option.
If for some reason you wish to cancel your changes without saving them, simply take the game out of self-test mode without executing the "SAVE SETTINGS" option!
To return to game play mode, return to the main menu, then select EXIT. That will return you to the testmode screen. At that point take the game out of self-test mode. The new settings will now have taken affect and the configured powerup game will be started.
Erasing High Scores
To erase high scores, select the game menu for Asteroids or Asteroids Deluxe, depending on which score table you want to erase. Within the game menu, select the HIGH SCORES sub item. Press fire to toggle through the 3 possible actions.
- KEEP ALL - No change to high score table
- RESET ALL - All high scores will be reset to 0
- RESET LOW 7 - The low 7 scores will be reset to 0, the top 3 scores will be preserved
The high scores will not be erased until you select SAVE SETTINGS. If you wish to cancel your changes, simply exit test mode WITHOUT selecting SAVE SETTINGS

Space Invaders Multigame and High Score Save Kit
"Space Invaders Multigame" is an easy to install kit that extends your Midway Space Invaders or Midway Space Invaders Deluxe boardset to play 8 games.
|
|
Plus many extras features such as Free Play, High Score Save, powerup Diagnostics, on-screen configuration Settings, and a interactive testmode.

Kit installs in minutes! No soldering or special skills needed. No special wiring or switches are needed! Switch between games by simply pressing both the player-1 and player-2 start buttons at the same time. A game selection menu will appear.
Includes on-screen game configuration settings and high score save for all games.
Space Invaders Multigame -- Game Selection
The game selection menu is activated by pressing BOTH p1-start and p2-start buttons at the same time. The game selection memu will appear.
To select the next game use the left and right buttons to move up and down. Once the desired game is selected, press the fire button to start that game.
At the bottom of the screen is the configuration utilty. Pressing fire while "configuration options" is selected will cause a menu of configuration options to be displayed. See game settings for a detailed description of the configuration options.


Battlezone High Score Save Kit -- Erasing High Scores
The procedure used to erase the Battlezone high score table is similar to that of other atari games.
Put the game into selftest mode. Refer to your manual on where to locate the SELFTEST switch. For uprights it is usually inside the coin door.
In selftest mode you should see a display that looks similar to this screen shot below.

While in selftest mode, press and hold both the START and FIRE buttons. When both buttons have been pressed at same time, you should immediately see a message displayed on the screen with the text "ERASED". This is the indication that the high scores have been cleared.

You can now release the buttons and exit selftest. The high score table will be returned to the factory default scores and initials.

Battlezone High Score Save Kit -- Trouble Shooting
A common mistake is not having the daughter card inserted correctly, either hanging over the socket by 1 pin, or in backwards. In this case the screen will be blank and the start LEDS are probably lit.
Another common mistake is for the 6502 CPU to have been inserted incorrectly, either backwards, or possibly with a pin bent that did not insert into the socket properly.
The Battlezone high score save kit will perform a very simple powerup selftest of the HS daughter card when the game is placed in selftest mode. Two additional lines of text are displayed during selftest that relate to the HS kit.
The first line either displays "ROM FAIL" indicating that the code eprom on the daughter card is defective, or it displays the rom revision (eg. "REV 00A") if the code eprom is good.
The 2nd section displays information about the HS save chip on the daughter card. It displays "HS FAIL" if that chip is defective, or it displays "ERASED" if all the scores have been erased, or it displays nothing if the chip is functioning properly.
Should you see the text "HS FAIL" during selftest it most likely that means that one of the socketed chips on the daughter card is probably lose. Check to make sure the 8-pin dip (the smallest chip) on the HS daughter card is fully inserted into its socket.


Congo Bongo High Score Save Kit -- Free Play
The original Congo Bongo game does not have a freeplay setting. It does have an unlimited lives setting which is wrongly documented as free play in the manual.
This high score save kit adds true Free Play capability to the game which can be turned on or off via the coinage DIP settings.
Free Play operates just like you would expect. The text "CREDIT 00" is replaced with the text "FREE PLAY" at the bottom of the screen. Attract mode continues to operate in its full normal fashion.

To start a game simply press P1-START or P2-START at anytime during attract mode. No coins required. No need to open your coin door.
This kit takes advantage of the coinage DIP combintions to provide a Free Play setting and to provide a Flip Screen setting. To turn on free play, set the coinage DIPs as indicated on the Congo Bongo Test Mode and DIP settings page.
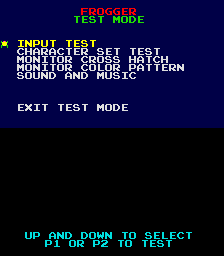
Operating Congo Bongo Test Mode
Congo Bongo is equipped with a diagnostic self-testing program that is initiated by pressing the SELFTEST switch located on the Control Board Assembly. It is a momentary red switch located in the corner of the board. Press and release it while the game is on to invoke test mode.
Once in test mode the game will quickly perform some simple self tests and display a screen like the one shown to the right.
Note: this kit enhances this screen to show additional information not found in the original Congo Bongo game.

Resetting Congo Bongo High Scores
Following the general test mode operation instructions above to put the game into test mode. (Press and Release the red SELFTEST switch on the gameboard)
To erase the high score table follow the on screen instructions (Press and hold the jump button until a message indicates the HS table has been cleared).
Once erased, a message indicated the high scores have been reset will appear.

Power cycle the game to return to game play mode.
The game will now have the original factory default high score table is displayed.
Note clearing the high score table reverts it back to the original Sega factory default table (not 0).

Congo Bongo DIP settings
To aid in setting the DIP switches, the Congo Bongo HS kit enhances the test mode display to show the current DIP switch settings in an easy to read format.
The original Congo Bongo software did not show this information. The additional DIP information is shown in the "settings" section.
Changing the DIPs while in testmode will cause the screen to be immediatly updated to reflect the current settings. See below for the definitions of the DIPs.

DIP Switch SW1
The Congo Bongo High Score Save Kit does not change the meaning of any of the DIP settings for SW1. They are presented here for reference only. However the meaning of some of the switch settings for SW2 have changed (see below).
Note: when using the unlimited number of hunters (lives) settings it is not possible to get a new high score. This is because the game never ends.
Note: from a looking at the congo bongo game software it is questionable if the diffcult settings were ever implmented in the software. It appears on the surface that these difficulty dip settings are ignored by the game. If you have information about this please let me know.
| Bonus | Difficulty | Num Hunters | Music | Table | ||||
| 1 | 2 | 3 | 4 | 5 | 6 | 7 | 8 | GAME OPTIONS (SW1) |
| ON | ON | Bonus @ 10,000 points | ||||||
| ON | off | Bonus @ 20,000 points | ||||||
| off | ON | Bonus @ 30,000 points | ||||||
| off | off | Bonus @ 40,000 points | ||||||
| ON | ON | Game Difficulty Easy | ||||||
| ON | off | Game Difficulty Medium | ||||||
| off | ON | Game Difficulty Hard | ||||||
| off | off | Game Difficulty Hardest | ||||||
| ON | ON | 3 Hunters | ||||||
| off | ON | 4 Hunters | ||||||
| ON | off | 5 Hunters | ||||||
| off | off | Unlimited Hunters | ||||||
| ON | Attract mode music ON | |||||||
| off | No Attract mode music | |||||||
| ON | Upright | |||||||
| off | Cocktail (table) | |||||||
DIP Switch SW2
The Congo Bongo coinage DIP settings are take the 8 switches and break them into two sets of 4 switches. One set for the left coin input, one set for the right coin input. This allowed operators to have, for example, a 25c quarter slot on one side and a dollar coin slot on the other side. The 4 switches then define 16 different combinations of number of coins mapped to number of credits, including all sorts of bonus combinations. See table below.
The Congo Bongo High Score Save kit takes advantage of this, by redefining the 2nd set of 4 coinage switches. This means you cannot have different coinage options for each coin slot. The kit forces the coinage to be the same for each slot. This is generally not a problem for collectors anyways, and most likely you will use the Free Play setting.
So, Original Congo Bongo, SW2 defines Coin-A and Coin-B options. With the HS kit, SW2 forces Coin-A coinage setting to be used for Coin-B. The newly created extra 4 switches are for new features such as Free Play and Flip Screen.
| Original COINAGE (SW2) | 1 | 2 | 3 | 4 |
| 4 coins / 1 play | ON | ON | ON | ON |
| 3 coins / 1 play | ON | ON | ON | off |
| 2 coins / 1 play | ON | ON | off | ON |
| 1 coin / 1 play | ON | ON | off | off |
| 1 coin / 2 plays | ON | off | ON | ON |
| 1 coin / 3 plays | ON | off | ON | off |
| 1 coin / 4 plays | ON | off | off | ON |
| 1 coin / 5 plays | ON | off | off | off |
| 1 coin / 6 plays | off | ON | ON | ON |
| 2c/1p + bonus 5c/3p, 6c/4p | off | ON | ON | off |
| 2c/1p + bonus 3c/2p, 4c/3p | off | ON | off | ON |
| 1c/1p + bonus 5c/6p | off | ON | off | off |
| 1c/1p + bonus 4c/5p | off | off | ON | ON |
| 1c/1p + bonus 2c/3p | off | off | ON | off |
| 1c/2p + bonus 5c/11c | off | off | off | ON |
| 1c/2p + bonus 4c/9p | off | off | off | off |
New features make use of the following DIP settings on SW2. #6 = Flip Screen, #7 = Free Play.
| Special HS kit settings (SW2) | Unused | Unused | Flip Screen | Free Play |
| 5 | 6 | 7 | 8 | |
| Free Play ON | ON | |||
| Use coinage settings SW2 | off | |||
| Flip Screen | ON | |||
| Normal Screen Orientation | off |

Donkey Kong High Score Save Kit -- Powerup Diagnostics

Donkey Kong High Score Save Kit -- Settings
On-screen settings allows you to configure your game without crawling into the cabinet to set dip switches and allows configuration of the extra features. Explanation of each item follows.
To enter settings mode, power cycle your machine. After the powerup selftest completes the game will pause for a few seconds allowing the opportunity to enter setup mode. Press the P1-START button before the count down timer has expired to enter the settings mode.
Once in the settings mode, use the joy stick UP and DOWN positions to move about the menu. The current selected item is indicated by a special icon character on the left side of the screen. To make changes to the current selected item, use the JUMP button. For each press, the current selected field will toggle to the next option.
To save the settings and enter gameplay mode, scroll down to the bottom item, and press the JUMP button. At this point the currently displayed configuration will be saved and the gameplay will begin.
If for some reason you wish to cancel your changes, you must power cycle the game instead of executing the "SAVE AND EXIT" option.
The very first time settings mode is entered for your game, the default values will be determined from your current DIP switch settings. Once the configuration has been saved, the DIP switch settings are no longer used (except for upright versus cocktail which always uses the DIP switch to select).

JUMPMEN: Configures the number of lives for the game. Options include the standard 3, 4, 5, or 6, lives. Also included is the ability to set the lives to UNLIMITED, which is not part of the original donkey kong games. It should be noted with this cheat the game never ends, thus cannot be used to generate bogus high scores entries - sorry.
BONUS: Configures the score at which point you are awarded a bonus jumpmen. The standard options are: 7K, 10K, 15K, 20K
HIGH SCORES: Used to erase the high score table. 3 options are available. KEEP ALL, which preserves all high scores (default). ERASE ALL, which will erase all 5 high score entries. ERASE 2-5, which will erase high score entries 2 through 5, but preserve the highest score. The erase does not take affect until the "save and exit" option is selected at the bottom of the screen.
COINAGE: This option controls how many coins are required to play the game and how many credits those coins grant. The standard options are available, plus a new "true" FREE PLAY setting. Click for details about free play.
BOOT TIMEOUT: Allows control of how long the powerup selftest results are display and thus how much time you have to enter settings mode before the count down timer expires and automatically enters gameplay mode. Options include 0, 5, 10, 20 SECONDS, and WAIT, "Wait" means never timeout, always wait for a button press before continuing.
The use of the "0 seconds" timeout option is special. With this option the use of P1-START to enter settings mode is disabled, and you can never get back into setup mode. This can be used to prevent any unwanted tampering with settings. Use this option with caution as it becomes very difficult to to reverse back. Should the need arise to revert back to where the setup menu can again be accessed when using this lockout feature, there are two ways to accomplish this.
With method 1, there is a small window of time in which settings mode can be activated by pressing (and holding) any coin switch or the internal credit service switch inside of the machine during the bootup sequence. This window of time is very small and the credit switch must be active while the game is powering up. If done correctly, the game will be in wait mode where P1-START will again temporarily allow access to the settings menu.
Method 2 is to remove the small 8 pin chip on the HS kit. This is the chip that saves the high scores. Remove this chip, and power up the game WITHOUT this chip installed. This will cause the powerup selftest to fail when it tests the HS chip. This leaves the game in a mode where the setup menu can again be accessed. BEFORE you enter settings mode you must re-install the 8-pin HS chip. You must do this while power is applied, thats right, while the game is on and while it is in the mode of waiting for the setup sequence. This will not harm the chip, just make sure pin-1 is oriented correctly. Install the HS chip, then use P1-START to enter settings, and dont forget to save the new settings, preferably with a non-zero boot timeout so you dont go through this hassle again.
The use of "BOOT TIMEOUT: 0 SECONDS" was removed in later versions.
ATTRACT SOUND: Controls how often attract mode sound is activated. This is an extra feature above the standard donkey kong. It can be set to OFF (never), FULL for sound on every cycle through attract mode, or 50 PERCENT, 25 PERCENT, or 12 PERCENT for less frequent use.

Donkey Kong Junior High Score Save Kit -- Powerup Diagnostics

Donkey Kong Junior High Score Save Kit -- Settings
On-screen settings allows you to configure your game without crawling into the cabinet to set dip switches and allows configuration of the extra features. Explanation of each item follows.
To enter settings mode, power cycle your machine. After the powerup selftest completes the game will pause for a few seconds allowing the opportunity to enter setup mode. Press the P1-START button before the count down timer has expired to enter the settings mode.
Once in the settings mode, use the joy stick UP and DOWN positions to move about the menu. The current selected item is indicated by a special icon character on the left side of the screen. To make changes to the current selected item, use the JUMP button. For each press, the current selected field will toggle to the next option.
To save the settings and enter gameplay mode, scroll down to the bottom item, and press the jump button. At this point the currently displayed configuration will be saved and the gameplay will begin.
If for some reason you wish to cancel your changes, you must power cycle the game instead of executing the "SAVE AND EXIT" option.
The very first time settings mode is entered for your game, the default values will be determined from your current DIP switch settings. Once the configuration has been saved, the DIP switch settings are no longer used (except for upright versus cocktail which always uses the DIP switch to select).

JUMPMEN: Configures the number of lives for the game. Options include the standard 3, 4, 5, or 6, lives. Also included is the ability to set the lives to UNLIMITED, which is not part of the original donkey kong games. It should be noted with this cheat the game never ends, thus cannot be used to generate bogus high scores entries - sorry.
BONUS: Configures the score at which point you are awarded a bonus jumpmen. The standard are: 10K, 15K, 20K, 25K.
HIGH SCORES: Used to erase the high score table. 3 options are available. KEEP ALL, which preserves all high scores (default). ERASE ALL, which will erase all 5 high score entries. ERASE 2-5, which will erase high score entries 2 through 5, but preserve the highest score. The erase does not take affect until the "save and exit" option is selected at the bottom of the screen.
COINAGE: This option controls how many coins are required to play the game and how many credits those coins grant. The standard options are available, plus a new "true" FREE PLAY setting. Click for details about free play.
BOOT TIMEOUT: Allows control of how long the powerup selftest results are display and thus how much time you have to enter settings mode before the count down timer expires and automatically enters gameplay mode. Options include 0, 5, 10, 20 SECONDS, and WAIT, "Wait" means never timeout, always wait for a button press before continuing.
The use of the "0 seconds" timeout option is special. With this option the use of P1-START to enter settings mode is disabled, and you can never get back into setup mode. This can be used to prevent any unwanted tampering with settings. Use this option with caution as it becomes very difficult to to reverse back. Should the need arise to revert back to where the setup menu can again be accessed when using this lockout feature, there are two ways to accomplish this.
With method 1, there is a small window of time in which settings mode can be activated by pressing (and holding) any coin switch or the internal credit service switch inside of the machine during the bootup sequence. This window of time is very small and the credit switch must be active while the game is powering up. If done correctly, the game will be in wait mode where P1-START will again temporarily allow access to the settings menu.
Method 2 is to remove the small 8 pin chip on the HS kit. This is the chip that saves the high scores. Remove this chip, and power up the game WITHOUT this chip installed. This will cause the powerup selftest to fail when it tests the HS chip. This leaves the game in a mode where the setup menu can again be accessed. BEFORE you enter settings mode you must re-install the 8-pin HS chip. You must do this while power is applied, thats right, while the game is on and while it is in the mode of waiting for the setup sequence. This will not harm the chip, just make sure pin-1 is oriented correctly. Install the HS chip, then use P1-START to enter settings, and dont forget to save the new settings, preferably with a non-zero boot timeout so you dont go through this hassle again.
The use of "BOOT TIMEOUT: 0 SECONDS" was removed in later versions.
ATTRACT SOUND: Controls how often attract mode sound is activated. This is an extra feature above the standard donkey kong. It can be set to OFF (never), FULL for sound on every cycle through attract mode, or 50 PERCENT, 25 PERCENT, or 12 PERCENT for less frequent use.

Operating Donkey Kong 3 Test Mode
| Pressing and holding the SERVICE switch will cause the Test Mode menu to be displayed. A flashing icon points to the current test. Momentarily depressing the SERVICE switch will step to the next test. When the flashing icon is pointing to the desired test, the details of that test can be displayed by pressing and holding the SERVICE switch. You can return to the test mode menu from within a test by pressing and holding the SERVICE switch until the menu appears. Return to game mode by selecting the last test "Return to game mode" and pressing and holding the SERVICE switch until it returns to game play mode.
|

Erasing Donkey Kong 3 High Scores
Following the general test mode operation instructions, put the game into test mode. (Press and hold the SERVICE switch until the menu appears).
Select the menu item "1-DISTRIBUTIONS" (normally already selected). Press and hold the SERVICE switch until the distribution screen appears.

Press P1-START or P2-START to clear the distributions. Note the message on the bottom indicates this will also clear the high scores.
For the Donkey Kong 3 High Score save kit, this also resets the high scores back to the factory defaults.
At this point, the game should have returned to the test mode menu with the next item selected.

At this point, the game should have returned to the test mode menu with the next item selected.
Advance the menu to "4-RETURN TO GAME" by Momentarily depressing the SERVICE switch will step to the next test. Once the last item is selected, press and hold the SERVICE switch until it returns to game play mode.
At this point the high score table should have the following factor default scores and initials.

Setting Donkey Kong 3 FREE PLAY mode
Following the general test mode operation instructions, put the game into test mode. (Press and hold the SERVICE switch until the menu appears).
Select the menu item "2-FREE PLAY" by momentarily pressing the SERVICE switch.
Once selected, Press and hold the SERVICE switch until the free play screen appears.

Press P1-START or P2-START to toggle the current free play setting.
For the Donkey Kong 3 High Score save kit, the free play option selected will be saved along with the high scores.
Press (and hold) the SERVICE switch to return to the test mode menu.

Donkey Kong 3 Monitor tests and diagnostics
Following the general test mode operation instructions, put the game into test mode. (Press and hold the SERVICE switch until the menu appears).
Select the menu item "3-MONITOR ADJUSTMENT & SELF-TEST" by momentarily pressing the SERVICE switch.
Once selected, Press and hold the SERVICE switch until the first diagnostic test screen appears.
Press either start button to proceed to the next test. The test screens are shown below for reference.


This feature collects your initials when a new top 5 high score has been achieved.
The user friendly interface is much like those found on other games.
Simply use the joystick LEFT and RIGHT in order to highlite the desired letter. The current letter is indicated by a red cursor underneath the character. Once positioned at the desired letter, press either P1-START, P2-START, or joystick UP to save the letter. [Note: on a cocktail for player-2, you can only use joystick up, to save the letter]
DEL can be selected to delete a letter already entered. (eg. Delete and backup).
SPC can be selected to insert a space " ".
Once the desired name has been entered, move the cursor and select END. Your name will then be registered in the high score table.

You have a fixed amount of time to enter your initials, approximately 60 seconds. The timer is similar to the bonus-timer frogger uses during gameplay. A green bar at the bottom of the screen indicates how much time is left. A warning sound is played when less 10 seconds remain and the time bar turns to red.
Below shows example screen shot during high score name entry.

Frogger High Score Save Kit -- Powerup Diagnostics

Frogger High Score Save Kit -- Settings

Frogger High Score Save Kit -- Test Mode Feature
From the Seinfield eposide "The Frogger"
George and Jerry are in an old pizza parlor they used to visit a lot in the past and George notices the old Frogger game he used to play. The pizza place is going to be torn down and George discovers that he still has the high score on the game. George decides he must save the Frogger game so that the legacy of his high score can live on. Kramer recruits a character named Slippery Pete to assist in saving the game. Kramer uses caution tape to secure the area as best he can. But then everyone notices that time is running out on the portable power unit giving power to the game. Power to the game will be gone in mere minutes. With no caution tape left George attempts to move the Frogger arcade game across the street and to the nearest power supply. With the movement noise of the classic Frogger game, George moves in and out of traffic and attempts to cross the street. The game ultimately is smashed and another of George's dreams dies.
GEORGE: (on telephone) I need a guy that can rig a Frogger machine so that I can move it without losing power, 'cause I have the high score. H-hello?
GEORGE: Kramer, listen to me. I'm never gonna have a child. If I lose this Frogger high score, that's it for me.
JERRY: Once you unplug the machine, all the scores will be erased.
GEORGE: You're right. Why must there always be a problem? You'd think just once I could get a break. God knows I earned it with that score!
The above extracted from movieprop.com and "Tom's Comedy Quotes".

Pressing and holding the SERVICE switch will cause the Test Mode menu to be displayed.
A flashing shellcreeper points to the current test. Momentarily depressing the SERVICE switch will step to the next test. When the shellcreeper is pointing to the desired test, the details of that test can be displayed by pressing and holding the SERVICE switch.
You can return to the test mode menu from within a test by pressing and holding the SERVICE switch until the menu appears.
Return to game mode by selecting the last test "RETURN TO GAME MODE" and pressing and holding the SERVICE switch until it returns to game play mode.

Following the general test mode operation instructions, put the game into test mode. (Press and hold the SERVICE switch until the menu appears).
Select the menu item "1-DISTRIBUTIONS" (normally already selected). Press and hold the SERVICE switch until the distribution screen appears.

Press P1-START or P2-START to clear the distributions.
For the Mario Bros. High Score save kit, this also resets the high scores back to the factory defaults.
At this point, the game should have returned to the test mode menu with the next item selected.

At this point, the game should have returned to the test mode menu with the next item selected.
Advance the menu to "4-RETURN TO GAME" by Momentarily depressing the SERVICE switch will step to the next test. Once the last item is selected, press and hold the SERVICE switch until it returns to game play mode.
At this point the high score table should have the following factor default scores and initials.

Setting Mario Bros. FREE PLAY mode
Following the general test mode operation instructions, put the game into test mode. (Press and hold the SERVICE switch until the menu appears).
Select the menu item "2-FREE PLAY" by momentarily pressing the SERVICE switch.
Once selected, Press and hold the SERVICE switch until the free play screen appears.

Press P1-START or P2-START to toggle the current free play setting.
For the Mario Bros. High Score save kit, the free play option selected will be saved along with the high scores.
Press (and hold) the SERVICE switch to return to the test mode menu.

Mario Bros. Monitor tests and diagnostics
Following the general test mode operation instructions, put the game into test mode. (Press and hold the SERVICE switch until the menu appears).
Select the menu item "3-MONITOR ADJUSTMENT & SELF-TEST" by momentarily pressing the SERVICE switch.
Once selected, Press and hold the SERVICE switch until the first diagnostic test screen appears.
Press either start button to proceed to the next test. The test screens are shown below for reference.


The original Popeye game has a freeplay DIP setting, however, in that mode, the software simply forced the game to always have 90 credits.
This had the undesired affect of losing the attract mode screens. When the game was not being played as it always showed the ready screen and never showed the other attract mode screens. Not to mention the screen burn-in.

With the Enhanced Free Play provided by this kit, you get all the attract mode screen and features. Additionally the word "FREEPLAY" is displayed on the high score screen as a reminder the game is in free play mode.
To turn on free play, set the coinage DIPs as indicated in the manual. See Popeye Test Mode and DIP settings for specific details.

This information is also covered in the standard Nintendo Popeye operational manual.
(1) Entry
While pressing the Service Switch, set the power On/Off Switch to the "ON" position.
(2) Audio Test
You will hear a beep sound
(3) RAM Test
The result of the RAM test will be displayed.

(4) ROM Test
The result of the ROM test will be displayed.

(5) Option Switch Test
(6) Pressing any switch on the Operation Panel during while on the option settings screen will cause a beep sound.

Following the instructions above to put the game into test mode. (Press and hold the SERVICE switch while applying power).
When the "OPTION SWITCH" screen appears follow the instructions at the bottom for resetting the high score table back to the factory default. (press both P1-START and P2-START at the same time).

Once erased, a message indicated the high scores have been reset will appear.
Note the option switch screen also displays more information about the settings than the original Popeye game did. The information in color is added by this kit.

Power cycle the game to return to game play mode. Note: after about 30 seconds, the game will automatically return to game play mode.
The factory default high score table is displayed below.

To aid in setting the DIP switches, the Popeye HS kit enhances the test mode display to show the current DIP switch settings in both numeric and text. The original popeye software only showed the numeric data. The additional DIP information is shown in yellow. Changing the DIPs while in testmode will cause the screen to be immediatly updated to reflect the current settings.

| COINAGE (SW1) | A | B | C | D |
| Free Play | ON | ON | ON | ON |
| 1-Coin 1-Play | off | off | off | off |
| 1-Coin 2-Plays | off | ON | off | off |
| 2-Coins 1-Play | ON | off | off | off |
| Num Popeye | Difficulty | Bonus | Music | Table | ||||
| 1 I | 2 J | 3 K | 4 L | 5 M | 6 N | 7 O | 8 P | GAME OPTIONS (SW2) |
| off | off | Num Popeye 1 | ||||||
| ON | off | Num Popeye 2 | ||||||
| off | ON | Num Popeye 3 | ||||||
| ON | ON | Num Popeye 4 | ||||||
| off | off | Game Difficulty Easy (0) | ||||||
| off | ON | Game Difficulty (1) | ||||||
| ON | off | Game Difficulty (2) | ||||||
| ON | ON | Game Difficulty Hard (3) | ||||||
| off | off | Bonus @ 40000 points | ||||||
| off | ON | Bonus @ 60000 points | ||||||
| ON | off | Bonus @ 80000 points | ||||||
| ON | ON | No Bonus | ||||||
| off | No Attract mode music | |||||||
| ON | Attract mode music | |||||||
| off | Cocktail | |||||||
| ON | Upright | |||||||

The procedure used to erase the Red Baron high score table is similar to that of other atari games.
Put the game into selftest mode. Refer to your manual on where to locate the SELFTEST switch. For uprights it is usually inside the coin door.
In selftest mode you should see a display that looks similar to this screen shot below.

While in selftest mode, press and hold both the START and FIRE buttons. This is the same prodcedure used to erase the old EAROM. When both buttons have been pressed at same time, you should immediately see a message displayed on the screen with the text "ERASED". This is the indication that the high scores have been cleared.

You can now release the buttons and exit selftest. The high score table will be entirely erased. There will be no high score table dislayed until the first game is completed.

On-screen settings allows you to configure your game without crawling into the cabinet to set dip switches and allows configuration of the extra features. Explanation of each item follows.
To enter settings mode, power cycle your machine. After the powerup selftest completes the game will pause for a few seconds allowing the opportunity to enter setup mode.
Press P1-START before the count down timer has expired to enter the settings mode.
Once in the settings mode, use the joy stick UP and DOWN positions to move about the menu. The current selected item is indicated by a special icon character on the left side of the screen. To make changes to the current selected item, press the FIRE button. For each press, the current selected field will toggle to the next option.
To save the settings and enter gameplay mode, scroll down to the bottom item, and press the FIRE button. At this point the currently displayed configuration will be saved and the gameplay will begin.
If for some reason you wish to cancel your changes, you must power cycle the game instead of executing the "SAVE AND EXIT" option.
The very first time settings mode is entered for your game, the default values will be determined from your current DIP switch settings. Once the configuration has been saved, the DIP switch settings are no longer used (except for upright/cocktail and the sound on/off settings, which always uses the DIP switch).

SHIPS: Configures the number of ships granted at the start of the game. Options include the standard 3, 4, 5, ships. Also included is the ability to set the ships to UNLIMITED. It should be noted with the unlimited number of ships, the game never ends, thus cannot be used to generate a high score entry - sorry.
BONUS: Configures the score at which point you are awarded a bonus ship. The standard options of 10K, 20K, 30K, 40K, are selectable.
FREE PLAY: This option controls if FREE PLAY is ON or OFF. When free play is ON, the attract mode screens will show free play and no coins are required, simply press P1-START or P2-START to begin a game. If free play is OFF, then the coinage is determined by how the DIP switch is configured.
ATTRACT SOUND: Controls how often attract mode sound is activated. This is an extra feature above the standard Zaxxon. It can be set to OFF (never), FULL for sound on every cycle through attract mode, or 50 PERCENT, 25 PERCENT, or 12 PERCENT for less frequent use. Note: The Zaxxon DIP switch for enabling sound must be on, otherwise all sounds are disabled. (DSW1, position 7 must be ON).
HIGH SCORES: Used to erase the high score table. Erasing in this case means reverting back to the factory defaults (eg. high score of 8900 pts down to low score of 3700 pts and no initials) Three options are available. KEEP ALL, which preserves all high scores (default). ERASE ALL, which will erase all six high score entries. ERASE 2-6, which will erase high score entries 2 through 6, but preserve the highest score. The erase does not take affect until the "save and exit" option is selected at the bottom of the screen.
FLIP SCREEN: This option is more applicable to boards that may have been installed in non standard cabinets, or when used with, for example, jamma converters. It is used to flip the screen 180 degrees opposite of what it would be normally. The options are NORMAL (most common), and FLIPPED. Note this setting does not apply to test mode, so when set to "FLIPPED", the screen will be upside down during the entire test-mode sequence.
BOOT TIMEOUT: Allows control of how long the powerup selftest results are display and thus how much time you have to enter settings mode before the count down timer expires and automatically enters gameplay mode. Options include 0, 5, 10, 20 SECONDS, and WAIT, "Wait" means never timeout, always wait for a button press before continuing.
The use of the "0 seconds" timeout option is special. With this option the use of P1-START to enter settings mode is disabled, and you can never get back into setup mode. This can be used to prevent any unwanted tampering with settings. Use this option with caution as it becomes very difficult to to reverse back. Should the need arise to revert back to where the setup menu can again be accessed when using this lockout feature, there are two ways to accomplish this.
With method 1, there is a small window of time in which settings mode can be activated by pressing (and holding) any coin switch or the internal credit service switch inside of the machine during the bootup sequence. This window of time is very small and the credit switch must be active while the game is powering up. If done correctly, the game will be in wait mode where P1-START will again temporarily allow access to the settings menu.
Method 2 is to remove the small 8 pin chip on the HS kit. This is the chip that saves the high scores. Remove this chip, and power up the game WITHOUT this chip installed. This will cause the powerup selftest to fail when it tests the HS chip. This leaves the game in a mode where the setup menu can again be accessed. BEFORE you enter settings mode you must re-install the 8-pin HS chip. You must do this while power is applied, thats right, while the game is on and while it is in the mode of waiting for the setup sequence. This will not harm the chip, just make sure pin-1 is oriented correctly. Install the HS chip, then use P1-START to enter settings, and dont forget to save the new settings, preferably with a non-zero boot timeout so you dont go through this hassle again.
The use of "BOOT TIMEOUT: 0 SECONDS" was removed in version Z1.1